

One of the favorite activities in my pre-k literacy groups is the “feely box.” It is so simple but my students ask for it again and again. They get excited every single time I take this can out.
My mom was a preschool teacher when I was growing up and she played this game with her students using various objects from around the classroom. Since I teach reading, I adapted it for letter identification.
I suppose I should call this a “tactile grapheme identification activity” or something like that. But my four-year-olds call it the “feely game” and the name stuck.
Make It
I’ve used boxes and even a tissue box for the feely game. But my current one is holding up great. I think it is a keeper.
I used a large Trader Joe’s coffee canister. I go through an embarrassing number of these cans of coffee so they are always available in my house for crafting! So many things in my office are stored in upcycled coffee cans!
The canisters have a pull off foil lid so there are no sharp edges. I wash the inside of the canister and dry it well.
I created the top (to prevent peeking) with a cuff of an old sweater. A sock top works too. I just duck taped the sock to the outside top edge.
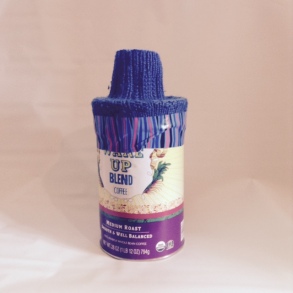
I’m going to admit that this is as far as I got for quite some time. I used it looking like this for an entire school year. The kids didn’t mind, but it was driving me crazy!
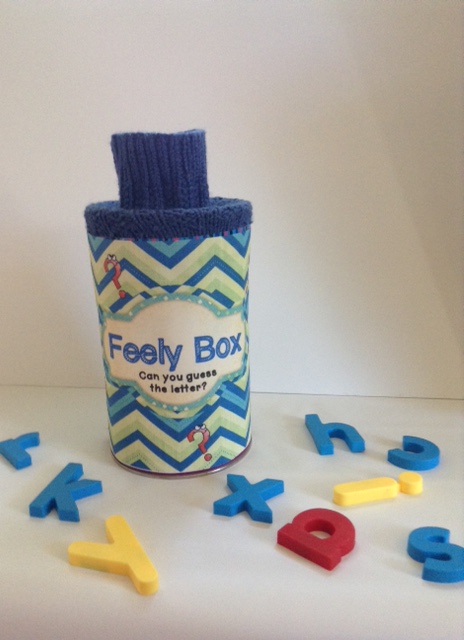
So when I had a chance, I covered it with a pretty paper and label. I printed out both sheets, trimmed the edges, and glued them on. I covered the entire thing with clear contact. There are probably better ways to do this, but it worked!
Note: There are several things that I did not do, but wish I had. You can learn from my errors!
I wish I had used a coordinating duck tape and had been a little more careful when taping the cuff. I did it one very early one morning when I had “feely box” on the lesson plan but found my old one had been crushed in my messy closet! The lumps and bumps in the tape made getting the paper on smoothly difficult. Also, the canister was a smidgen taller than my sheet of paper so a tiny strip of the tape showed. I wish I had measured and pulled the cuff down more or filled in the gap with a pretty coordinating tape. I could have printed out an extra sheet and cut it to edge the can first. I didn’t do any of these things and it looks a bit wonky!
I wish I had put the back sheet (describe guess check) on first and overlapped the front sheet.
The kids are not going to care, but you may!
To Play
Hide the can under the table or behind your back and place one large plastic letter in the can.
Ask a student to reach inside and feel the letter.
Instruct them to use words to describe what they feel. You may wish to model this.
“It has a big straight line and a small straight line going across it.”
“It’s round with a hole in the middle”
“It has two curved bumps.”
Then they should guess the letter and pull it out to see if they were correct.
Put another letter in and let the next student try it.
Notes
I find that having them remember to describe it first is the trickiest part. You will also have students that just pull it out before guessing. It takes a few times playing the game before everyone remembers to:
- describe
- guess
- check
I usually use lower case letters. I’m careful not to put in b/q or d/p during the same game. Using upper case makes this easier.
I usually ask them to tell me the sound, not the letter name. My kiddos almost always know the letter names, but we struggle to learn sounds.
This is such a simple, classic activity. You might think that in these days of iPads and more polished activities, this would be boring. In my experience, 3 to 5 year old kiddos still love this game!
Free Cover
In case you want to make your own, here is a free copy of my canister cover.
>>>>>>>>>>> feely box cover

Wow! I really like this and it is something I can use in my kindergarten classroom!
LikeLike
Great idea. Never be embarrassed in coffee can pile up. It’s necessity. lOl
LikeLike
You have such engaging ideas!
LikeLike
It is so cute! Love the cover over the top; I usually just hold it higher than the childs’ eyes! I am so making one of these! THANKS!
LikeLike
Fun games and ideas. Thanks for sharing.
LikeLike